Add and Assign Tax Categories
Before charging a Customer for any products in the Shop, you will need to add Tax Categories. These are the taxes that need to be applied to the sale of your products.
If your Shop Locations are in different regions, please note that Tax Categories are added to each Location individually. Tax Categories added to one region’s Location will not be available in another Location, should the second Location be in another region.
PLEASE NOTE: these Tax Categories are not taxes on Reservations, Events, Memberships, etc. The taxes within Tax Categories are ONLY in reference to the products in your Shop.
To learn more about taxes for Customer bookings, read this article. If you want taxes added to Customer bookings, contact your PodPlay CSM.
Add Tax Categories
To add taxes to products in your Location’s Shop:
Click on the Tax Categories button on the right side of the screen
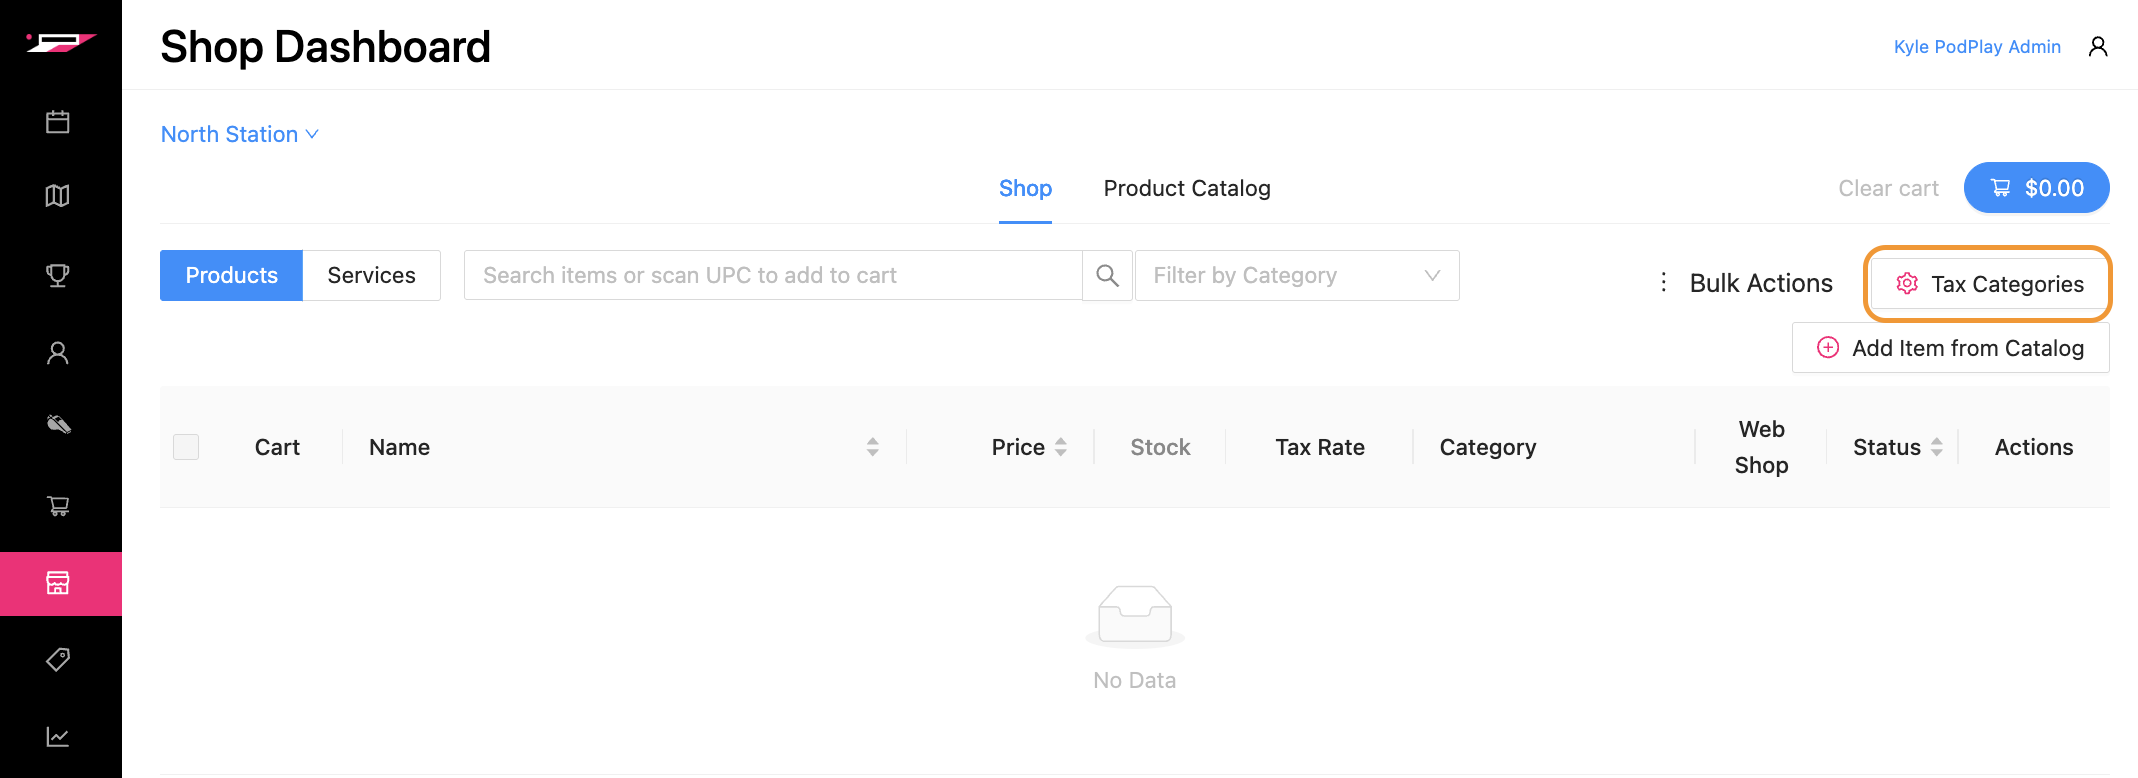
Notice a side panel appears
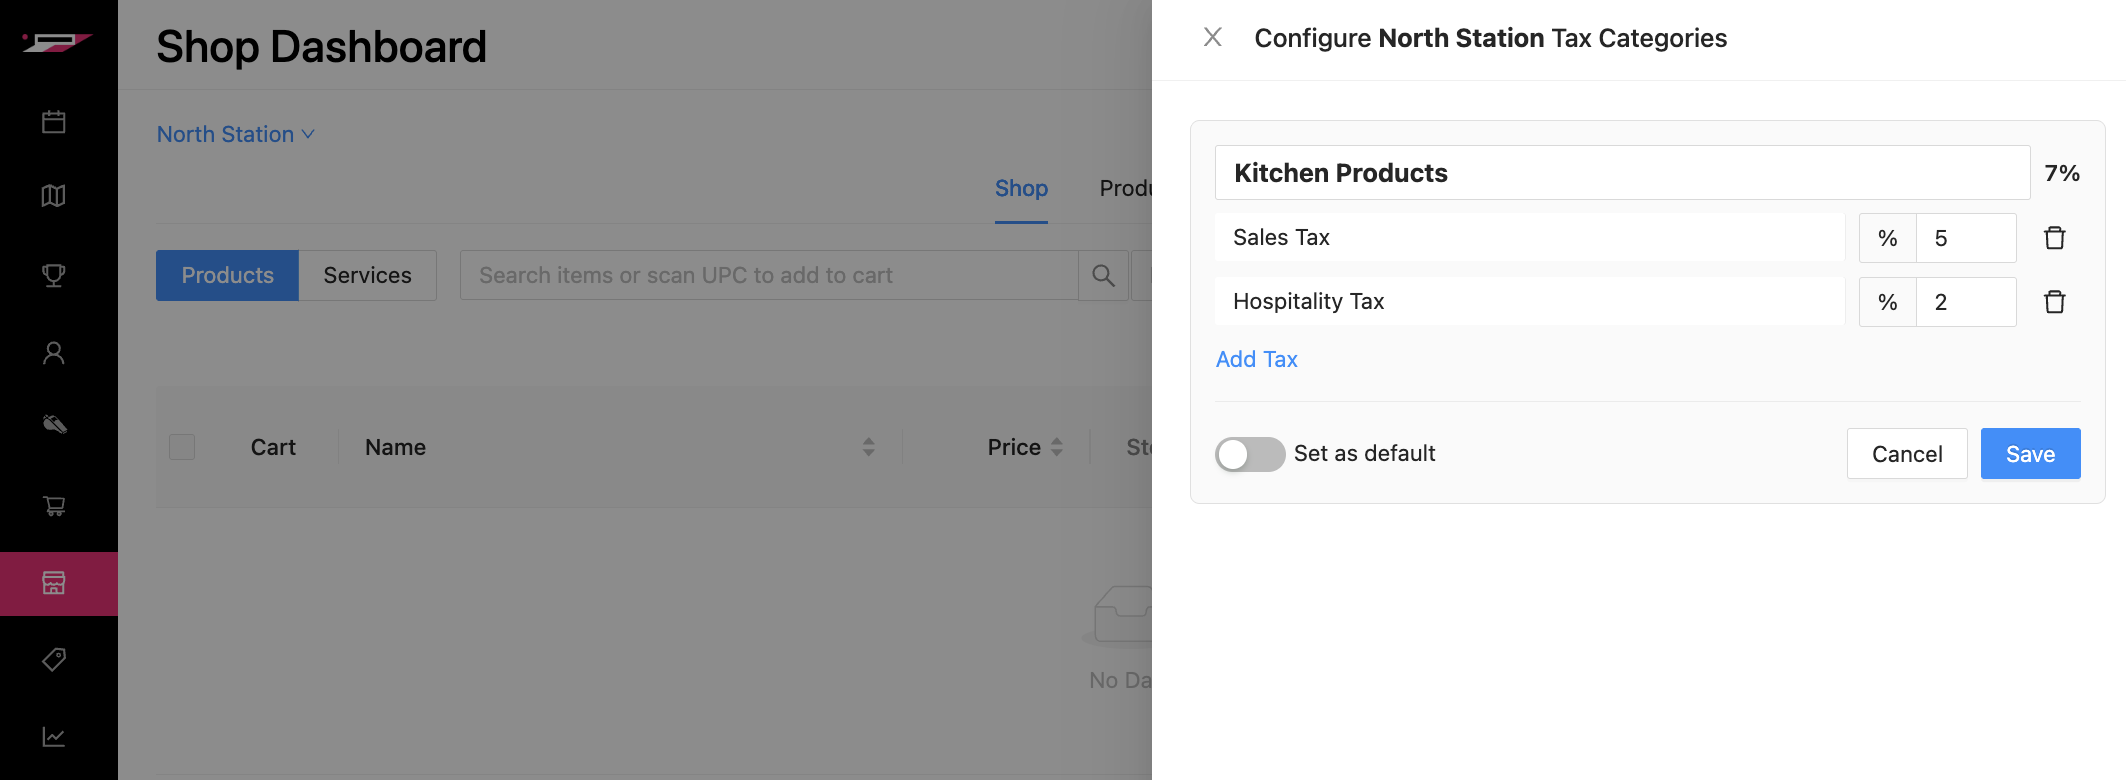
Click on the blue button labeled “Add Tax Category”

Enter the name of the Tax Category
This is a general name for the category, like: Kitchen, Merchandise, Services, etc.
You will want a Tax Category for each set of products sold that have different tax rates
Type in the required tax name
This is the name of the tax visible during checkout and on receipts
If you need to add multiple tax lines, you can click on “Add Tax” to add an additional row
Click on the blue “Save” button
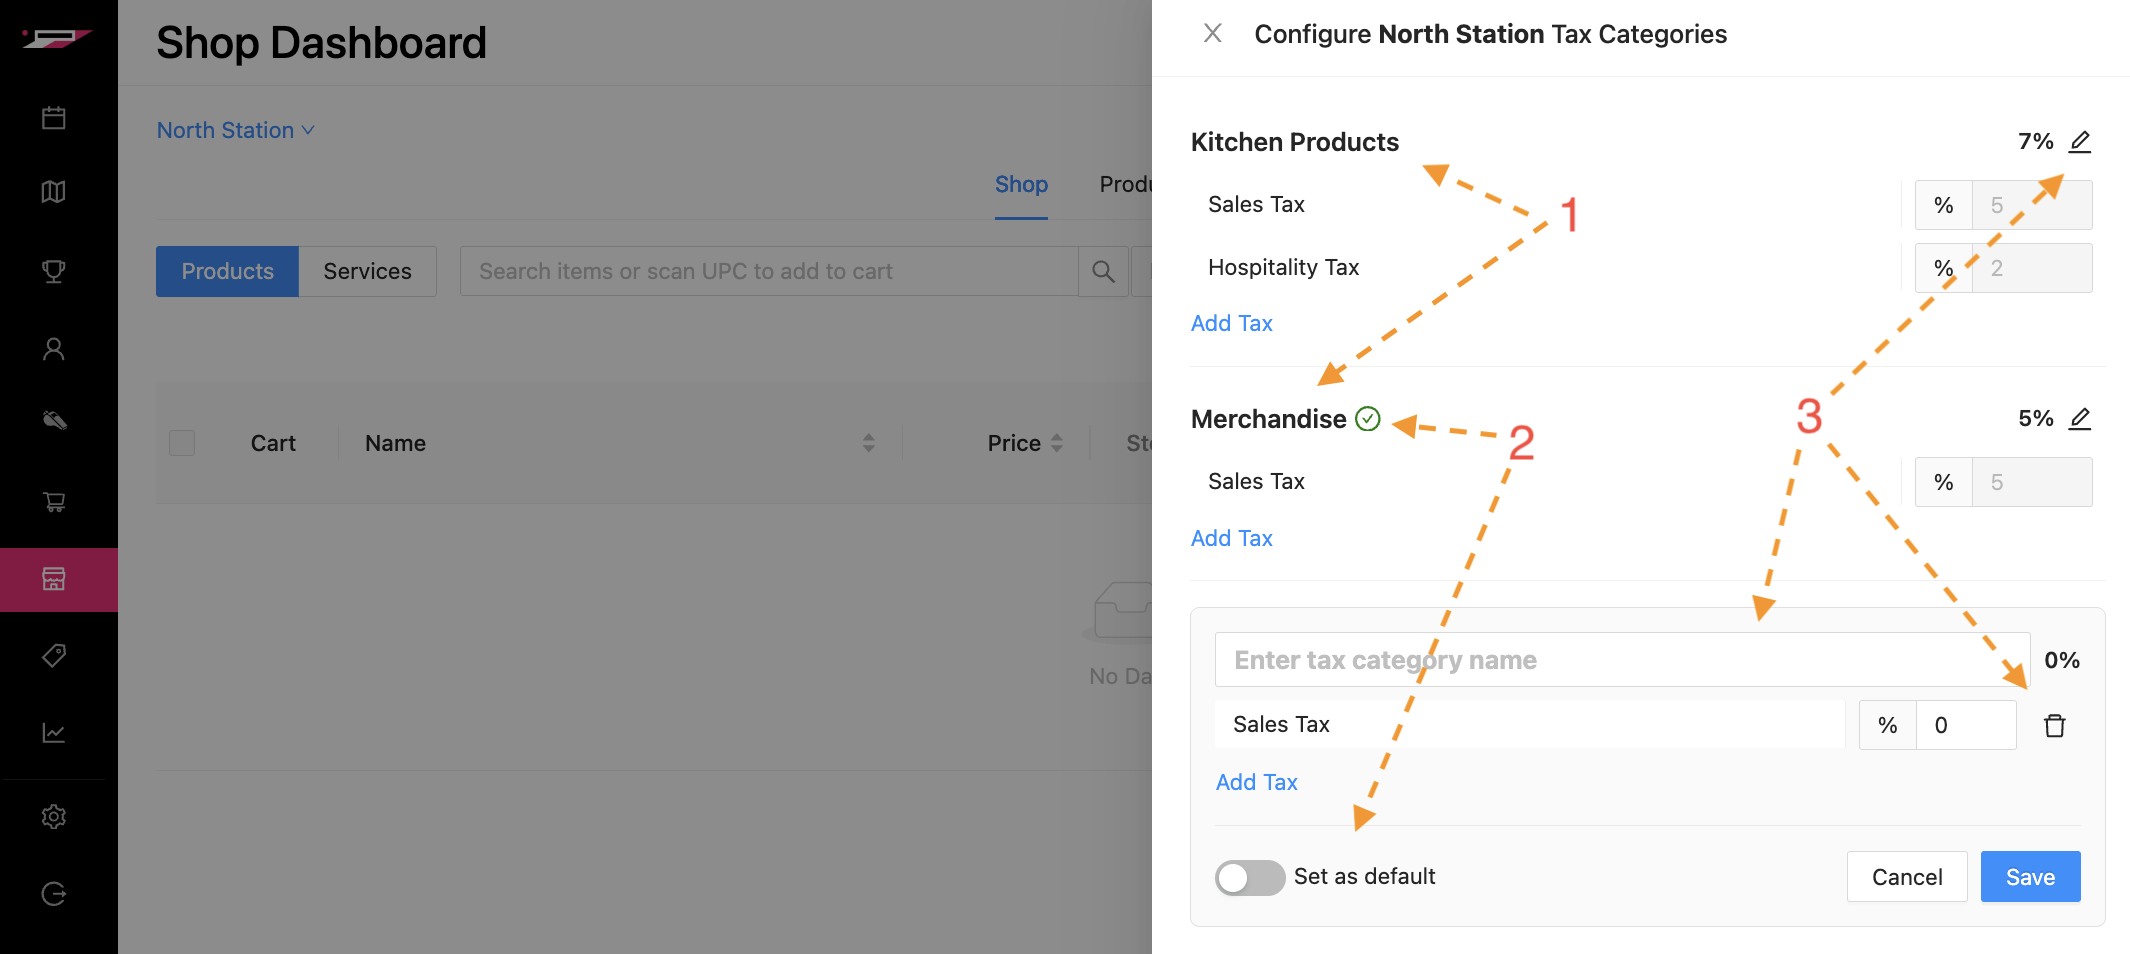
If your venue’s Location charges different taxes for different products sold, you will need to add multiple Tax Categories. To do this, click on the blue “Add Tax Category” button again
For any of the Tax Categories, you can flick on the “Set as default” toggle to automatically apply that Tax Category to new products add to the Shop from the Product Catalog. If a Tax Category is set as the default, it will show a green checkmark next to the name.
Should you need to edit these taxes in the future, you can click on the pencil icon next to the tax rate and adjust the name of the Tax Category, the tax rate, or delete tax line items.
Two Things to Note:
If you have multiple locations, you will need to add the Tax Categories to each venue’s location.
If there are items your Club is selling that will have a 0% tax rate, you can either:
Delete the Tax Category from individual products when you Edit a Product
Create a unique Tax Category that has a 0% tax rate and apply this Tax Category to all non-taxes products
Assign Tax Categories
Now that you have Tax Categories (a single one or many), you can assign them to products in your Shop.
When items are Added to Shop from the Product Catalog, these items will automatically pick up any default Tax Category.
The easier process is to select a default Tax Category
If no default Tax Category was selected, the items will not have a tax rate added.
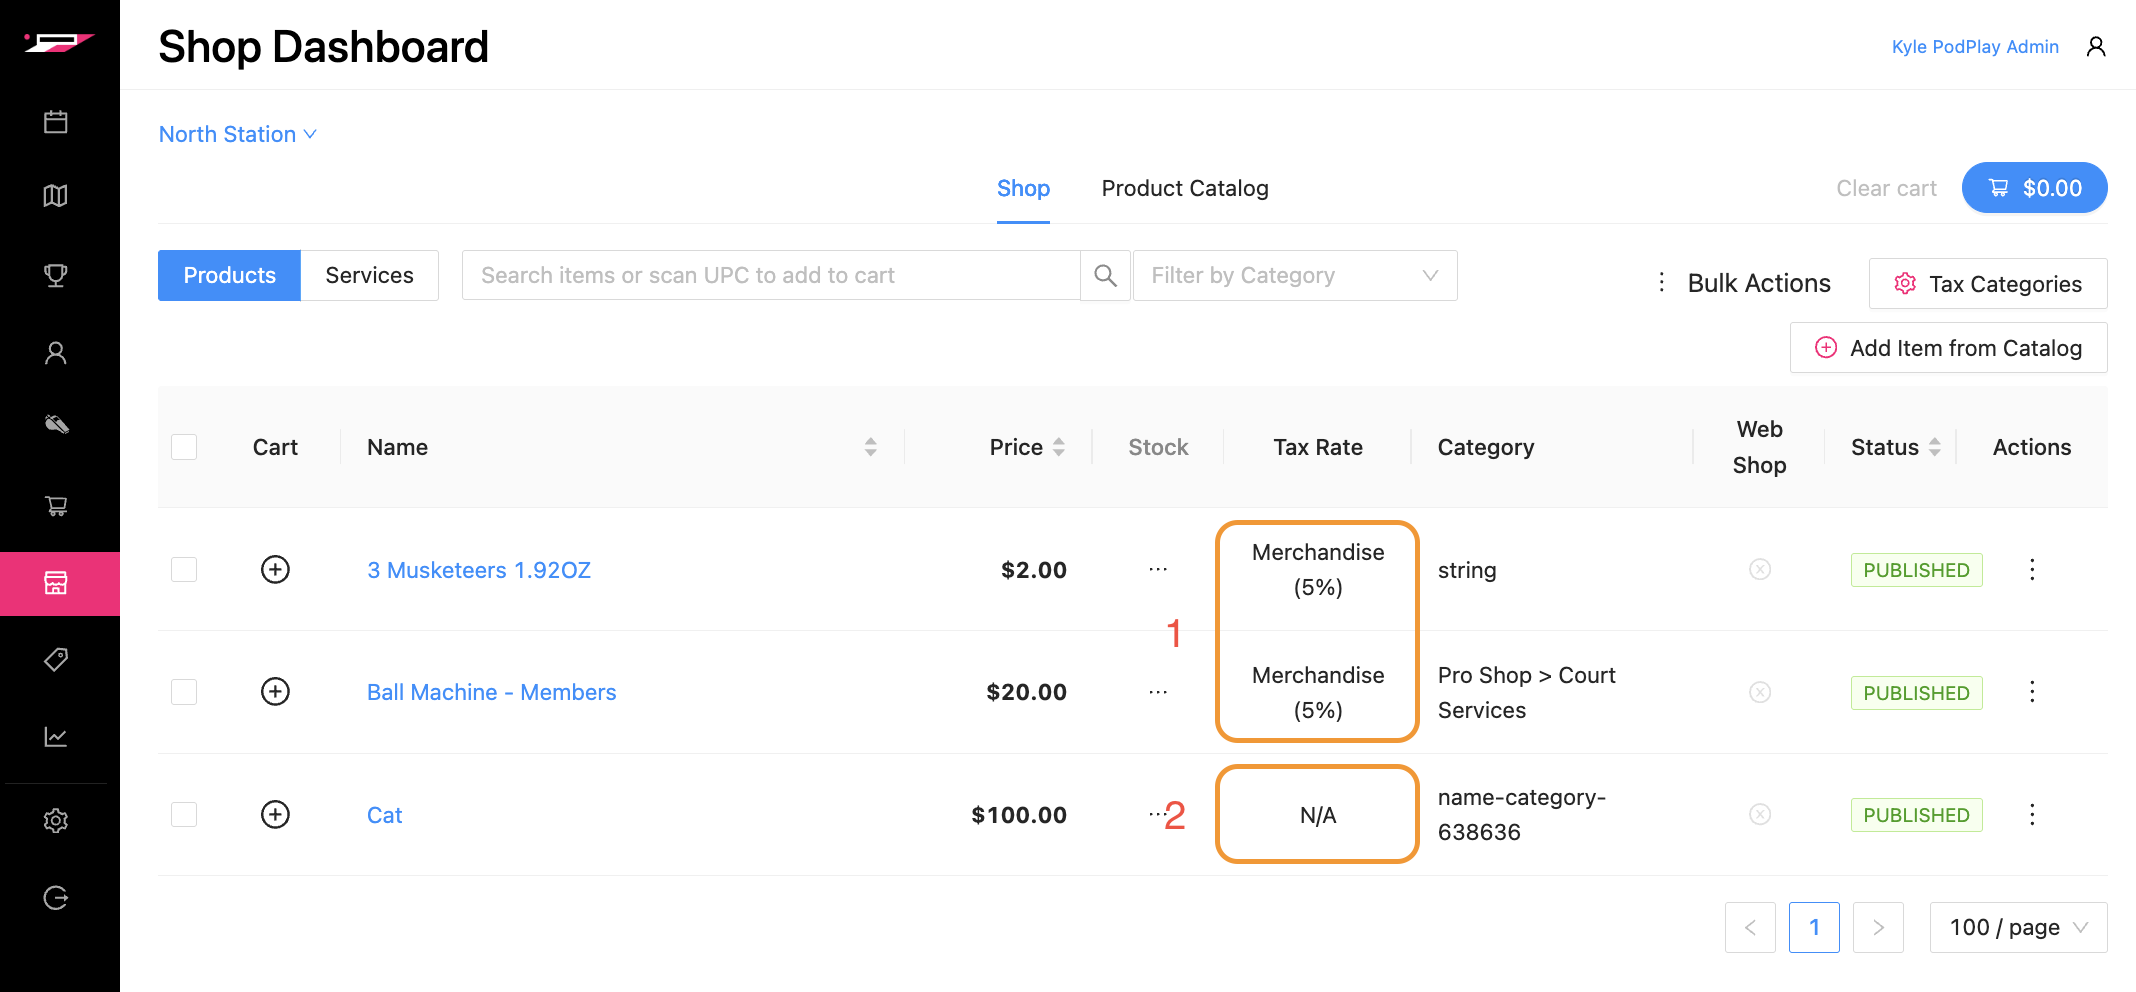
If there is no Tax Category applied to a product, or if the incorrect Tax Category is added to multiple products, you can either:
Assign the Tax Category on products one by one
Click on the three dots to the right of the product
Notice a side panel appears with the details of the product
Choose the Tax Category
Press the blue “Update” button at the bottom of the side panel
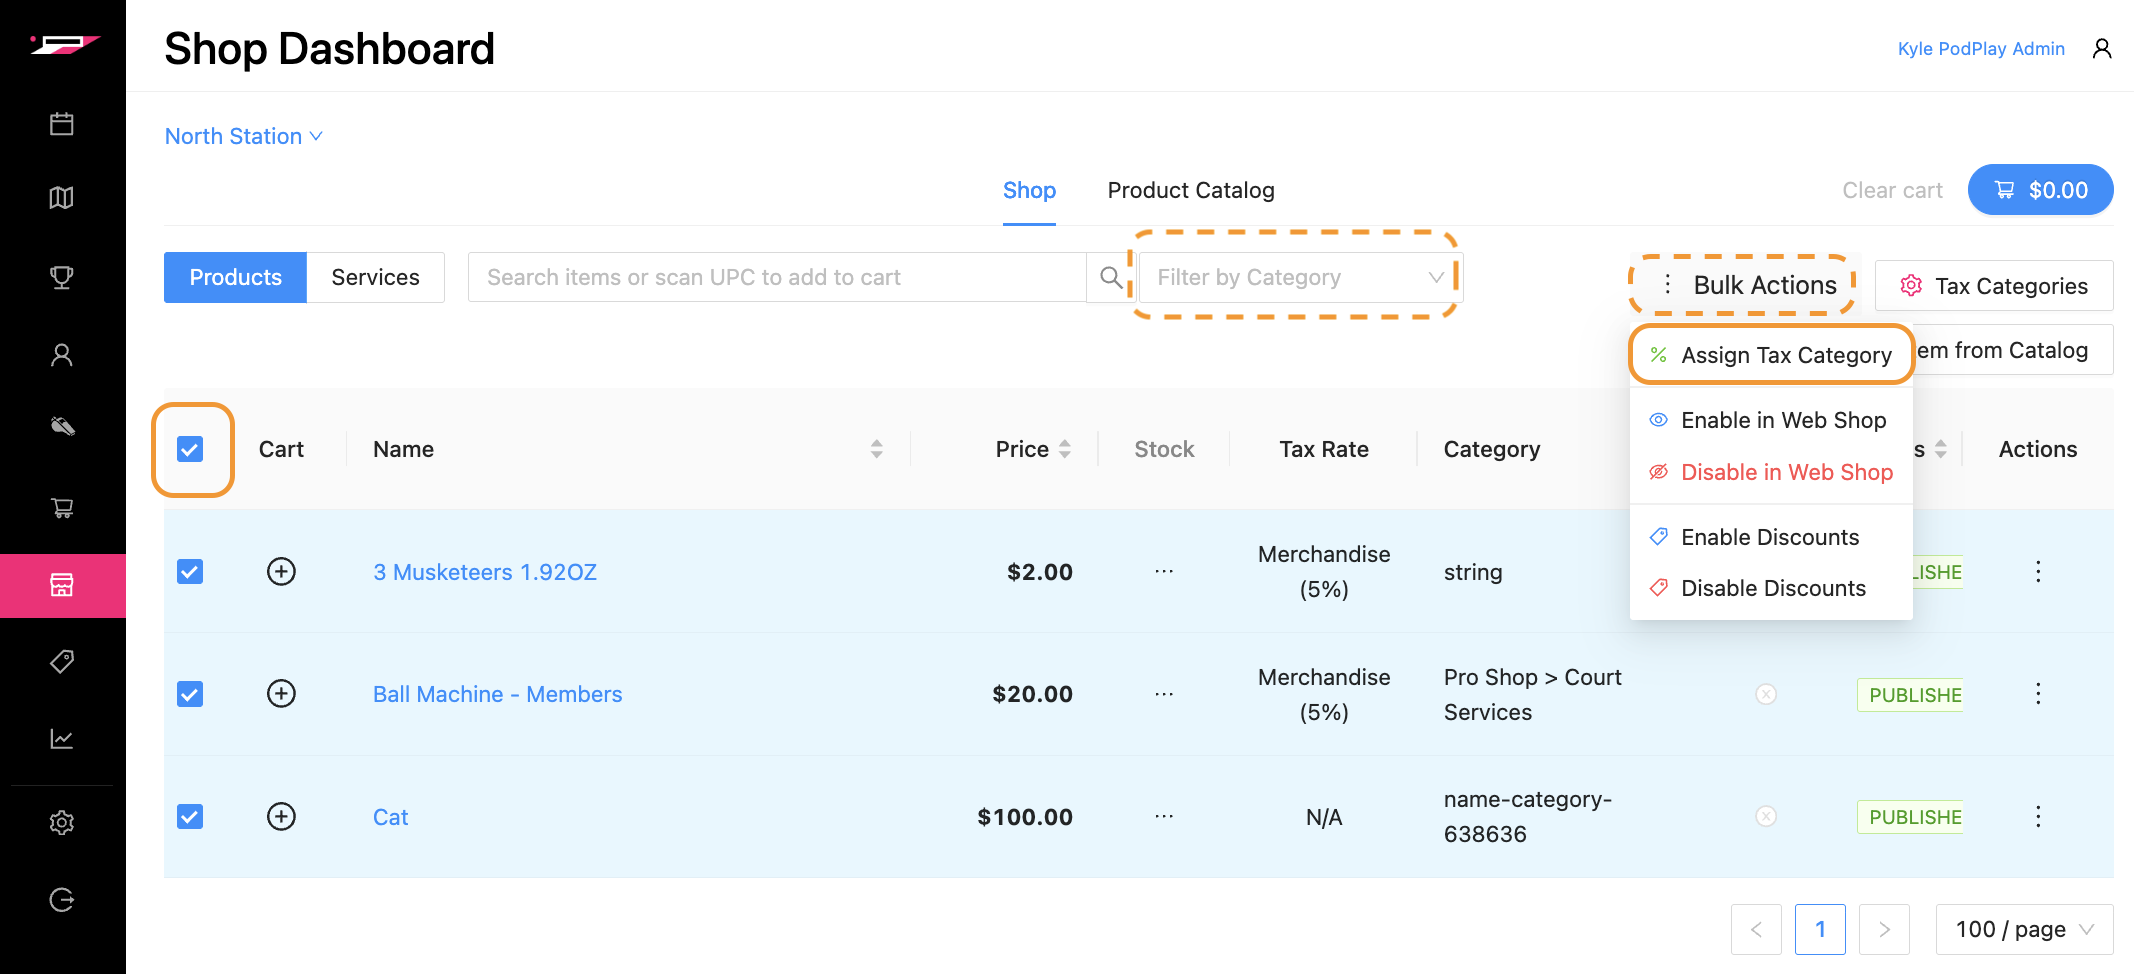
Create a Bulk Action and assign the Tax Category to several products at one time
Filter by product Category
To learn more, read about Add to the Product Catalog
Select the box at the top left (next to “Cart”) to highlight several products
Hover over “Bulk Actions”
Choose the “Assign Tax Category” action
Notice a small pop-up window will appear and will offer the available Tax Categories
Click on the blue “Assign” button to close the pop-up window and assign the selected Tax Category to all products highlighted